Different Nose Shapes And How You Can Contour Them!


Makeup can highlight everything we want on our face. It can even give you a quick transformation without undergoing surgery. Nose contouring is one of them.
For Flat Noses
As Pinays, we can get a little sensitive with the word "pango" but there's no need to worry because contouring can help you asap! To give it a raised, slimmer appearance, draw two parallel lines with contouring makeup on either side of the top of the nose, from just below the brows all the way down to the tip. Sheer out the edges of the lines, and you are done! You can also create greater contrast by applying a highlighter right on the bridge of the nose.
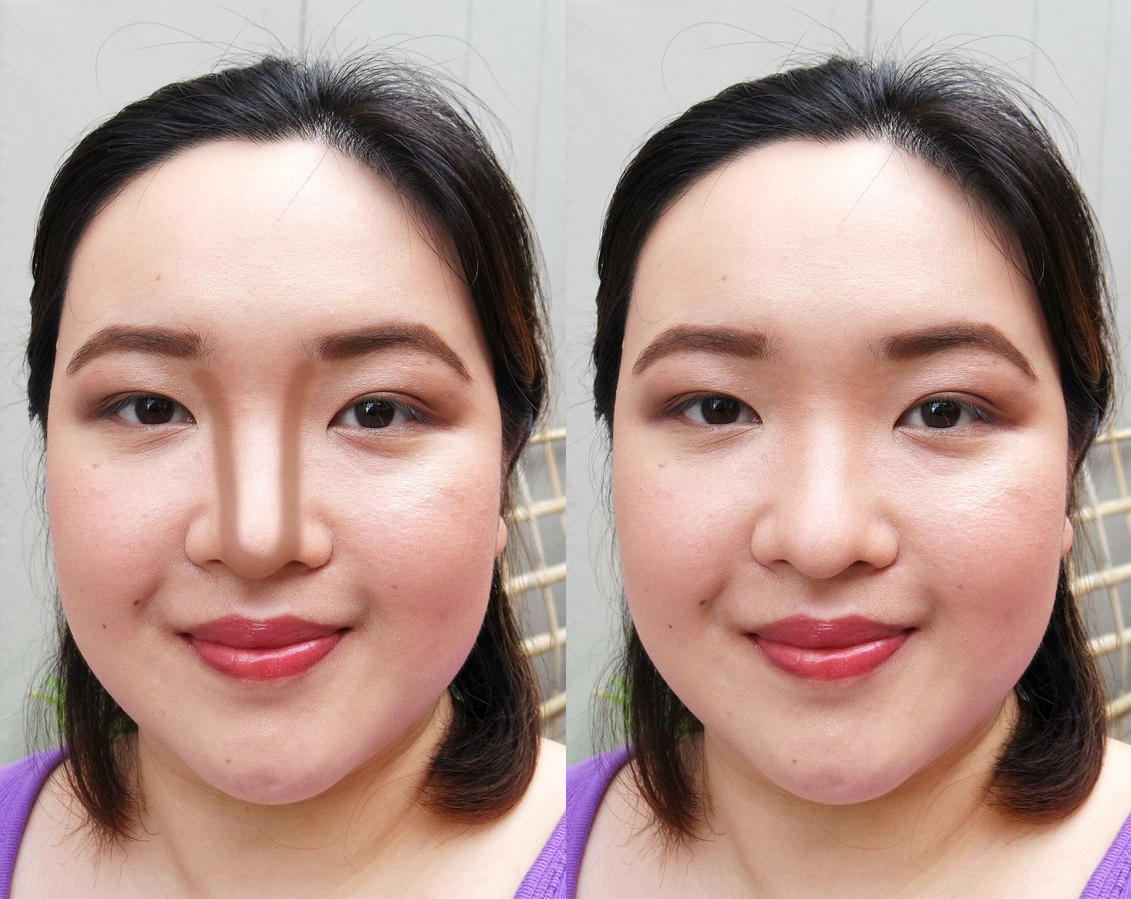
image source
For Crooked Noses
Different nose shapes require different techniques. If your nose isn't quite straight, then just adding lines may make the misalignment more obvious. Trick the eye into straightening it out by applying your contour product along the crooked side, and highlighter on the opposite side. This can be a little tricky as you need precision with your straight-line application to compensate for the bend, so make sure you're working under good lighting conditions.
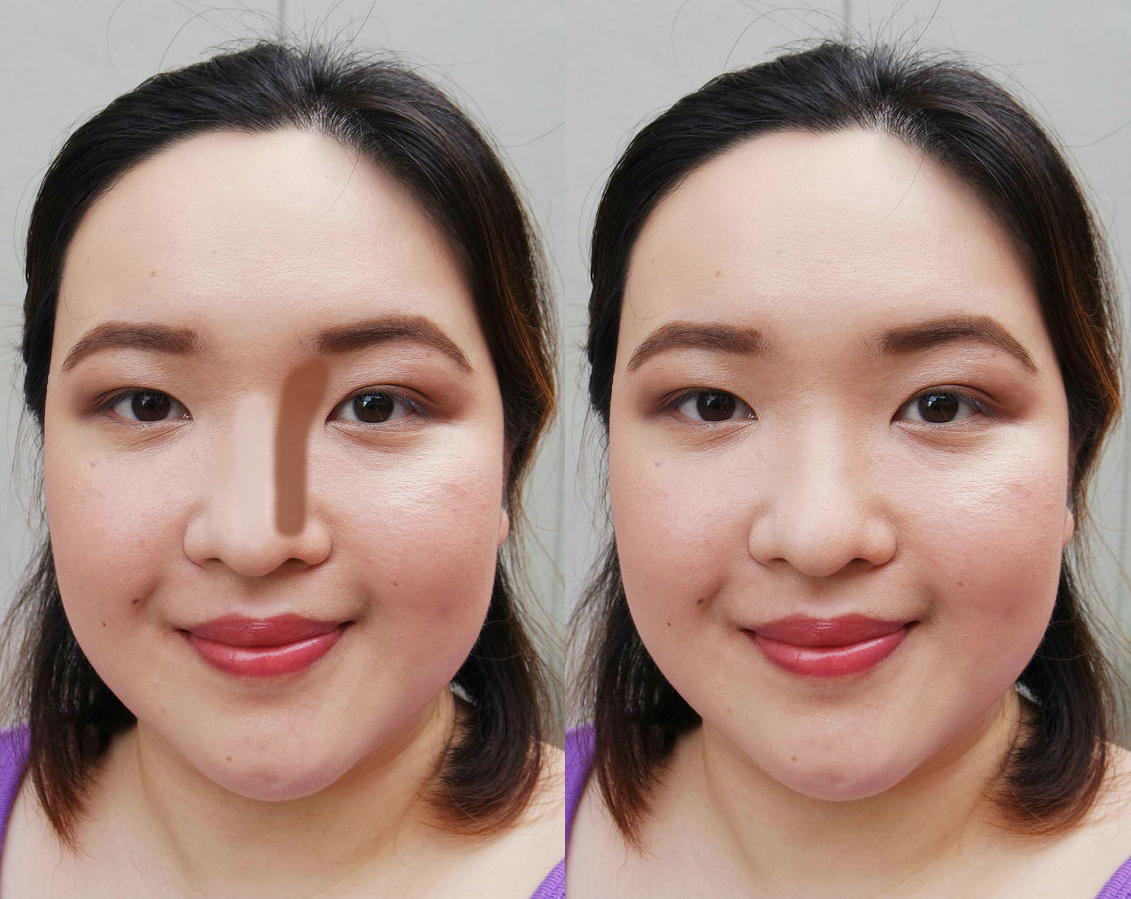
image source
For Round Noses
Round or bulbous noses are also commonplace among Pinays. We have our Asian heritage to thank for softer, rounder features, but the curves can make your face look wider. To make angles and edges appear, use your contour to create parallel lines from your brows going down the length of your eyes. Then make a softer version of the symbols “<< >>” on either side of the tip of your nose. Highlight the bridge of the nose to make it pop out.
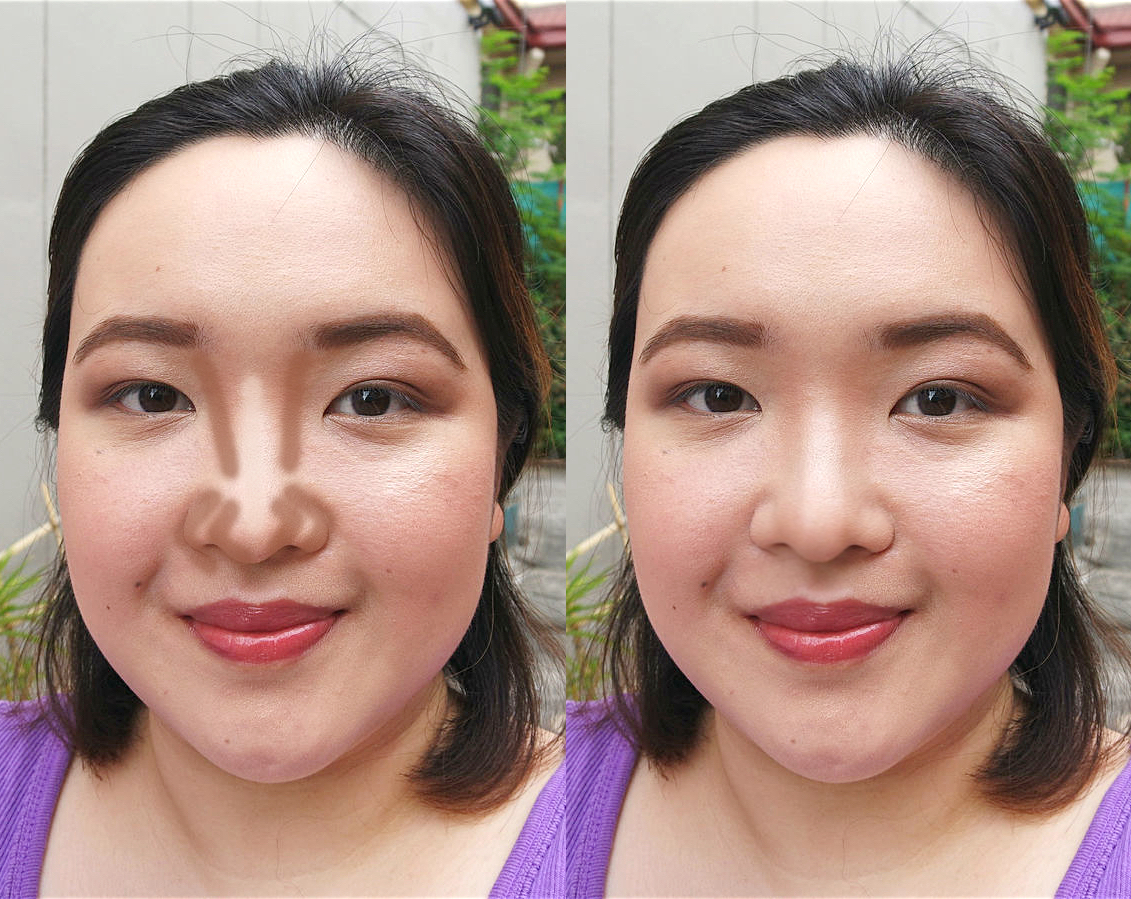
image source
You can use a contour powder or cream contour for any of these tricks.
You can also watch this quick tutorial below:
source: projectvanity
latest
on KikayDepartment.com


